
I’ve gained a bit of a reputation for doing family and friends special celebration cakes. I’ve done a few classes and taught myself a few things. I’m no pro, but I really enjoy it and I think I do pretty well. They are very time consuming and costly, so while I love that I can give that gift to my loved ones (I really see it as an act of love), I generally only do them for significant events- 1st birthdays, 18th birthdays, 30th birthdays, 60th birthdays, 80th birthdays, 90th birthdays, engagements and weddings. But somehow I managed to agree (without really agreeing, I think) to make my adorable nephew’s 2nd birthday cake. Here’s a few of my past creations;


I’ve recently (as I’ve mentioned a few times) started a new job with quite a long commute so spending hours each evening for the week leading up, preparing, was out of the question. My sister had sent me a picture of a cake which was pretty easy, but I planned it out so that it was as easy as it possibly could be. It was still staged so I needed to be home for a day or so (partly because I only own 1 tin in the size I needed) but the actual cake wasn’t time consuming, most of that time was spent with the cake in the oven or fridge. I thought I’d share because it’s easy enough that anyone could have a go, without any previous cake decorating skills. There are probably a lot of steps for the average cake maker, but no one step is difficult. So you too could make this impressive looking cake!
Here’s what I did;
- Packet mix cakes!When I make my really fancy cakes I generally do an amazing White Chocolate Mud cake (which I no longer eat since being gluten and dairy free but I remember the taste and it’s divine). But these kids are 2 years old. They don’t care for White Chocolate Mud cake from scratch! So I got 4 packet mix cakes and prepared as directed. Once cooked and cooled, I levelled them with my cake leveller.

2. I also purchased pre-made butter cream icing. I used 4 tubs in total. . I’ve used this icing a lot because it’s vegan and so I can serve it as ‘gluten and dairy free’ (even though I can tolerate butter) and still have great looking butter cream. I layered the butter cream between each layer. I stabilised the cake using paddle pop like craft sticks down through the layer (stack up 3 cakes push them through, with a little poking out and then place the 4th cake on top). I used a white cake board which was a few sizes bigger than my cake. I didn’t put the cake in the middle, I wanted it off centre so that i could put other decorations (dinosaur on the base of the cake). I then did a crumb coat (just a messy butter cream layer that locks in the crumbs before you do your nice layer). I then popped it in the fridge to chill.

3. Once the first layer was chilled I went in with a thicker finishing layer. This took a bit of effort to get it really smooth and flat. I used a scrapper and spatula. I also used a little trick where I get it as good as I can, pop it in the fridge to chill again and then finish it off with a spatula run under hot water. After I was happy I popped it back in the fridge. I actually let this layer sit over night but a few hours would be fine, just so it’s really cold is fine.


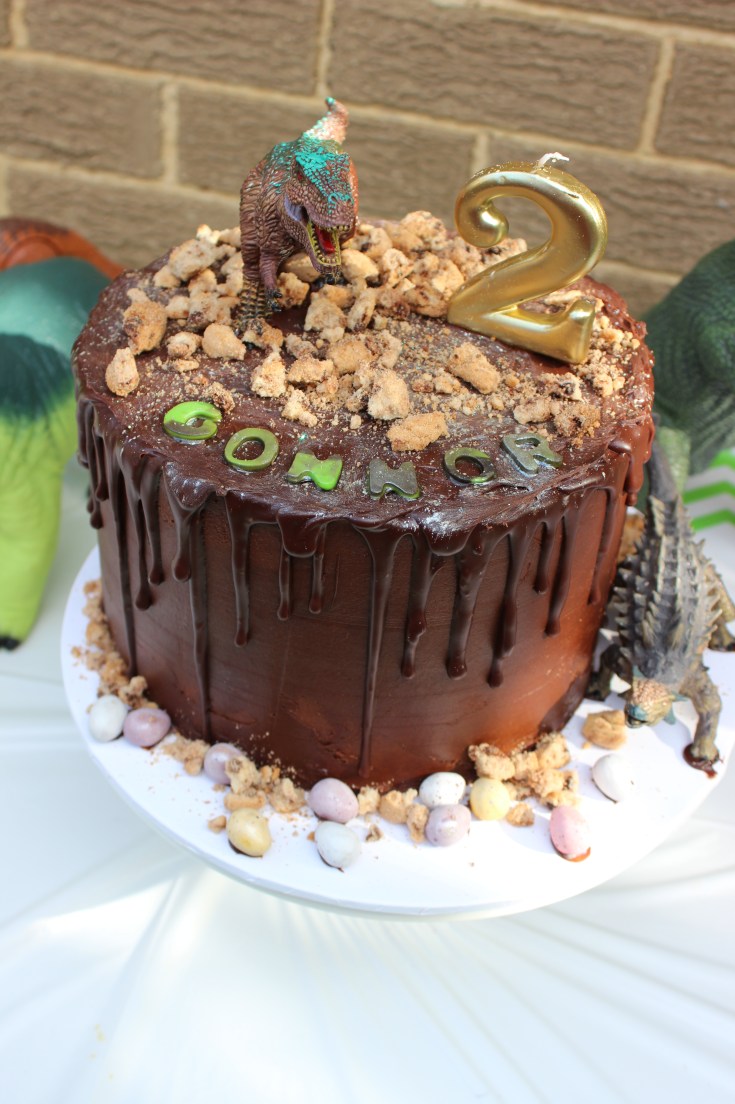
4. After it was set I made a chocolate ganache. I used equal parts cream and dark chocolate melts (1/2 a cup of each). I heated the cream in the microwave for 30 seconds. Added the chocolate and let it sit for a minute or so before stirring it through. I then let it sit on my bench for about an hour to thicken some. It was a warm day so you’ll just need to watch this, if it thickens too much you can just pop it back in the microwave for 5 seconds at a time. Once I was happy with the coldness of the cake and consistency of the ganache I used a teaspoon to dribble a little down the sides of the cake. I varied how much I used on each drip. If I wanted one longer I just went over it again. At the end I went back around (and the ganache had thicken a bit again) and put thicker globs (for lack of a better word) around the top too. It was actually really fun! Then I just spread a little ganache on the top of the cake to smooth the look.

5. I added one dinosaur figurine to the top of of the cake, securing the feet with some tooth picks (only because it didn’t stand up on it’s own). Covering the toothpicks with ganache. I then used ganache to fix the other dinosaur to the cake board. I then left this in the fridge again for about an hour.
6. I wanted to give the top a textured look. I have some food shimmer and glitter. So I sprinkled the shimmer over the top of the cake using a small sifter. I then took a small dense brush and texturised the cake, spreading the shimmer. I then sprinkled the cake with the food glitter. You could totally skip this step if you didn’t have these things already on hand.
7. I mixed black gum paste and green fondant (purchased) to create a mabled effect. I rolled this out and cut my nephews name out with letter cutters I have. I added these to the top of the cake with a number 2 candle. I added a light dusting of food shimmer to the fondant letters.


8. Honestly I probably could’ve left it there, but to add some different elements/textures and build on the cake I added some crushed chocolate chip cookies (packet) and some Cadbury shelled Easter eggs (which were the perfect dinosaur eggs!). I fixed the eggs to the cake board with ganache. I sprinkled the broken cookies on the cake and on the board (in chunkier rock like shapes on the top and finer crumbs on the board).


9. To serve I placed the cake board on to of a white footed plate, but could’ve just left it on the board. And there you have it, a pretty simple (even though there were a number of steps, none were difficult) cake that wowed!

Leave a comment